Making Passbook an Address Book
Tuesday, May 6, 2014
Intro
Ever since Apple first announced Passbook two years ago, I've always liked the idea of using it to store business cards.
However, it'd be far more useful if it could store Pokemon cards... someone should file a radar on that...
Every year at WWDC (and any conference really) it's super fun to play the "trading card game" and collect various business cards from people. Some are really cool, some are so fantastic that the people that gave you their card ... will ask for it back -_-
The first day Passbook was announced was when I made my first card and hopefully this'll stir up some creative Passbook business cards come WWDC 2014!
tl;dr: they're cool, you should make one.
How do I Passbook?
Making a Passbook business card is, well, easier than writing HTML! For the most part you're just filling in blanks in a JSON file. You create a folder, and inside that folder you put the main JSON file, throw in a few images, and BAM Passbook card (waves hands)!
Sharing them is just as easy, especially with iOS 7. With iOS 7 came AirDrop (a somewhat crippled version, fwiw) and with that you can share Passbook cards over AirDrop, or anywhere else from the standard iOS share sheet.
How do I JSON?
Let's look at mine as an example:
{
  "formatVersion" : 1,
  "passTypeIdentifier" : "pass.adambell.businesscard",
  "organizationName" : "diffractive",
  "serialNumber" : "0x1337",
  "teamIdentifier" : "sekrit",
  "description" : "Adam Bell",
  "generic" : {
    "primaryFields" : [
      {
        "key" : "name",
        "label" : "",
        "value" : "Mobile Developer"
      }
    ],
    "secondaryFields" : [
      {
        "key" : "website",
        "label" : "Web",
        "value" : "www.adambell.ca",
        "textAlignment" : "PKTextAlignmentLeft"
      },
      {
        "key" : "twitter",
        "label" : "Twitter",
        "value" : "@b3ll"
      }
    ],
    "auxiliaryFields" : [
      {
        "key" : "email",
        "label" : "Mail",
        "value" : "[email protected]"
      }
    ]
  },
  "barcode" : {
    "format" : "PKBarcodeFormatPDF417",
    "message" : "https URL here",
    "messageEncoding" : "iso-8859-1"
  },
  "backgroundColor" : "rgb(221, 18, 29)",
  "foregroundColor" : "rgb(255, 255, 255)",
  "labelColor" : "rgb(255, 255, 255)",
  "logoText" : "Adam Bell",
  "suppressStripShine" : true
}
The meat of the pass is under the generic section. Depending on the type of pass you're making, you can specify a multitude of fields (like departure / arrival if you were making a flight ticket), but for our sake we're just re-purposing a generic pass. Your teamIdentifier is used to specify your signing identity if you want to sign your pass but we'll get to that.
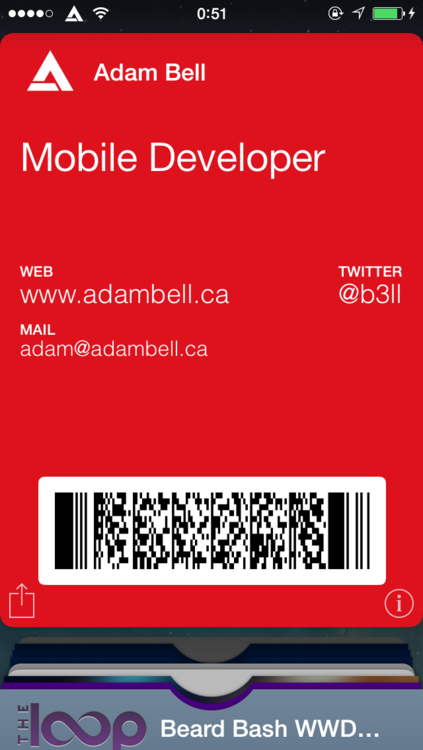
Here's how I tailored my pass as a business card:
Description
I don't really know if this used on iOS, but on Windows Phone it shows up in the live tile... more on this later.
Primary Fields
Set the value of name to a title for yourself, I kept Mobile Developer to keep things nice and simple. If you want to be fancy, might I recommend something like "iOS Connoisseur" (complete with air quotes)?
- Side-Note: Each of these fields also has a label which is basically just a way to define what it is. The key can be whatever you want, as long as it's unique ('name' could be 'title', or even 'panda' if you really want to be 'cool').
Secondary Fields
Here you get up to two fields to specify information (after that it looks kinda stupid with text all smushed together). I chose my twitter handle and website, since they're the easiest way to show off what I've done as well as get quickly in contact.
Auxiliary Fields
You get 1-2 more fields for info. I chose my email, since I'd rather people use it as a last resort (for most things) ;)
Barcode
This is the fun part. With iOS 7 came the ability to scan barcodes to download Passbook passes. It uses the same wicked fast iTunes gift card scanning / redeeming tech, but comes with some minor annoyances.
First off, the link specified here must be HTTPS. ...unless of course you break PKAllowHTTP() ;)
You get 3 types to pick from:
- Aztec
- QR
- Standard barcode (which I think looks best)
If you choose Aztec or QR, the rest of the card just ends up being a massive zebra.
Also, you might want to enable suppressStripShine, last thing you want is your pass looking like a shiny zebra (unless you like shiny pokémon!)
Everything Else
- backgroundColor: well... the background colour (in rgb format)
- foregroundColor: you guessed it! the foreground colour (in rgb format)
- logoText: the text that shows at the top of the Pass
- If you drop a logo.png (don't forget @2x assets), Passbook will display your logo in the top left.
- If you drop a thumbnail.png (don't forget the @2x assets), Passbook will display a photo in the middle of the pass.
- On the back side you can provide additional info, but I didn't feel it was necessary (personally).
"Security" Notes
- Update: I was nice and decided to upload a direct link to a version of Apple's signpass utility which skips any .DS_Store files from being added to the pkpass file here.
You can invoke it like so:
pkpass -p <some folder> -o <outputfile.pkpass>
- You need to sign your pass. Apple has some great notes and a sample signing utility here. So get ready for some provisioning profile dancing!
- Read that ^
- If you want to share your pass via barcode:
- It needs to be hosted on an HTTPS address
- It needs to be distributed with
pkpassas the file extension. - It needs to be distributed with
application/vnd.apple.pkpassspecified as the MIME type.
- Amazon S3 provides all this!
- Read the first point again.
Enter the Windows Phone
What's even more awesome is Microsoft decided to be nice (or lazy :D) and support Apple Passbook cards in Windows Phone 8.1! They work out of the box too! You can simply email a pass to your Windows Phone and add it that way.
What's nice is you literally have to change nothing, it just works.
That's a first for Microsoft. :P
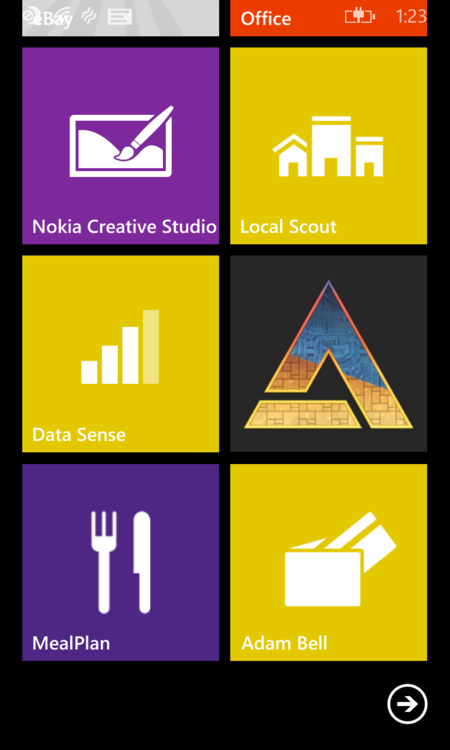
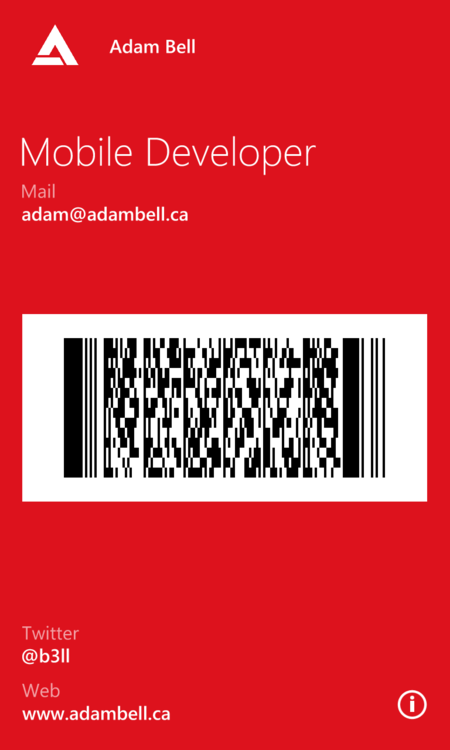
As I mentioned earlier, description is the field that defines what will show on the Windows Phone Start Screen when you add your pass as a live tile (super quick access to contact details!). Best practice for this is to keep it short and simple unless you have an arbitrarily long name that just overflows everything...
- Side-Note: One thing I did notice about loading passes with Windows Phone, if it throws an extremely useful error 0, your JSON is probably malformed. Run it through jsonlint or something equivalent, fix it, and then you should be good to go! :D
Party Time
If you haven't used Passbook yet, this might be a fun way to start. Might put you on the "bleeding edge" of business cards! :D
PS: Pokémon Passbook cards really should be a thing.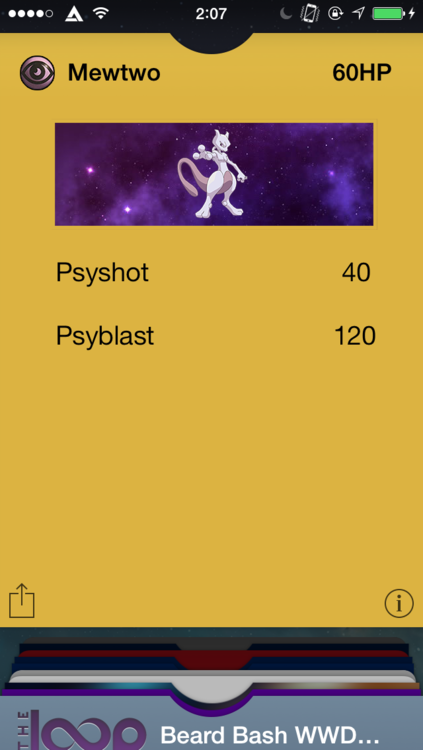
I wish I could have a larger strip image, a gold border, and a purple background, but the current Passbook spec doesn't allow it. :(